by Larry Owens


Category: Images

Testing a 16″ Scope

8 April, 2010 (21:39) | Images, Uncategorized | By: ltowens

Hello everyone,

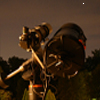
I’ve been busy finishing the construction of a 16″ scope for the CE chapter of the AAC (Atlanta Astronomy Club).  It’s probably not what you think.  This one is a 16″ Newtonian on a large “Tom Dobbins” German Equatorial mount.  That’s pretty unique today when most large aperture Newtonians are Dobs (Dobsonian).

wctruss_tube_mounted-018

The design and construction of the scope is a long story, so for that just check out the CE website under “Projects”, then “Truss Tube” and there are other links under “Byers”.

The mirror we used on this scope was refigured and recoated by Galaxy optics not long ago, and turned out to be one of the best optics I’ve ever used, making this scope one terrific high power planetary imaging system.

Here’s a shot of the crater Archimedes and this is actually the first image taken with the big scope (below).

archimedes_032410_stg1

The smallest craters you see in this image are about 1000 feet across, possibly less and that’s incredible resolution, considering that the moon is nearly 240 thousand miles away and 2100 miles in diameter.

This next image is the second shot taken with the scope and it’s of the planet Mars (below).  Now you may think it’s not that great compared to some of the spectacular shots taken of the red planet from Earth, but Mars in this shot was nearly 100 million miles away, and only 9 arc seconds across so it’s actually a pretty good shot.

mars_040210_0055ut

Here’s shot number 3 taken with the scope, and this is Saturn of course (below).  I had to work the next day so I had to take this image in less than ideal conditions.  The planet was just 41 degrees above the horizon and the atmosphere was fairly turbulent.

saturn_040210_0238ut

These images in all are very promising for this scope and with the increased resolution and light gathering power over the C14 I’ve been using, you should expect to see some amazing images of the planets in the months to come.

Dark skies,
Larry

The Challenges of Jupiter Imaging

24 August, 2008 (18:42) | Images, Presentations, Video | By: ltowens

challenges_jupiter.jpg

Hello everyone,

On the surface, imaging the planet Jupiter can seem relatively easy as planets go. It’s big (46″ angular size) and bright (-2.7 magnitude now), in fact Jupiter is the brightest of the planets next to Venus or Mars (during a good opposition). But, imagers are often disappointed with their initial attempts with the great planet.

To help in the quest for high resolution images of Jupiter, I put together a class called “The Challenges of Jupiter Imaging”. Instructor in Astronomy Jim Honeycutt offered a classroom at Emory Univeristy’s Oxford College in Covington, GA, and on August 23, 2008 we presented the class to about 16 amateur astronomers and others interested in the subject.

The class was a lot of fun, and turned out to be educational for everyone, including me. The labs were probably the most interesting and included stacking techniques for Jupiter images using Registax, and some rather detailed color combining and processing tricks in PhotoShopCS.

Thanks to Jim Honeycutt and Oxford College for an excellent place to have the class and for the drinks and snacks everyone enjoyed during break.  Thanks also to Jon Wood for video taping the class!


Below you’ll find links to the presentation, some of the images used in the course and a video of the class.  If you would like to take the course online, first download the presentation, then download the workshop images and watch the video.  You should have Registax v3 or v4 and PhotoShop on your system for the course.  The “avi” files used in the class are not included below because of size, so use some of your own during the course, or just watch the Registax lab.

Link to the Acrobat version of the Presentation (should take 2 minutes on broadband connection)

Link to the PowerPoint version of the Presentation (should take 4-5 minutes on broadband)

Here’s a link to photos taken during the class at Oxford (I’m the bald guy in the plaid shirt)

Here’s an outline of the course.

Below are links to the 5 monochrome workshop images that were used for color combining (Don’t forget to convert these to ”grayscale” before attempting to process them):
NOTE – RIGHT click on each link and “Save Target As” (these are .tif format files):

Jupiter0023, Jupiter0024 (for R(G)B processing – Convert to “grayscale” first)

Jupiter0004, Jupiter0005, Jupiter0006 (for RGB processing – Convert to “grayscale” first)

The video (below) is available in both Windows Media (recommended) and Real Media. Your player should start the video in just a few seconds after clicking the link, but if the player wants to download the video completely before showing it, that should only take a few minutes, so be patient.

Video Part I: Presentation (60 min – Windows Media or Real Media)

Video Part II: Conclusion of presentation, start of workshop (60 min – Windows Media or Real Media)

Video Part III: Workshop (45 min – Windows Media or Real Media)

Here’s the link to “Real Video” if you need the player

Dark skies,

Larry